Configuring your Hosts File
In order for your local development environment to work correctly, you'll need to configure your hosts file. This file tells your computer where to look for specific domain names. This is important for local development because you'll be using domain names like laravel.dev.test instead of localhost.
We're looking to automate this functionality in the future, but we're very adamant about having it work across all operating systems without advanced customizations. We've seen a few solutions, but they require too much setup and are not user-friendly. If you have any ideas, we'd love to hear your thoughts →
What is a Hosts File?
A hosts file is a simple text file that maps IP addresses to domain names. When you type a domain name into your browser, your computer checks the hosts file to see if it has an IP address for that domain. If it does, it uses that IP address to connect to the server. If it doesn't, it will use a DNS server to look up the IP address.
Why do I need to configure my Hosts File?
When you're developing locally, you'll be using domain names like laravel.dev.test instead of localhost. This is important because it allows you to mimic real-world environments and allow you to test your application with 3rd party services.
macOS & Linux
To configure your hosts file on macOS or Linux, you'll need to edit the /etc/hosts file. You can do this by running the following command in your terminal:
Edit the hosts file on macOS or Linux
sudo nano /etc/hosts
This will open the hosts file in the nano text editor. You'll see a list of IP addresses and domain names. To add a new entry, simply add a new line at the bottom of the file with the IP address followed by the domain name. For example:
Add a new entry to the hosts file
127.0.0.1 laravel.dev.test
127.0.0.1 mailpit.dev.test
127.0.0.1 vite.dev.test
127.0.0.1 reverb.dev.test
Press CTRL + O (that's an "oh" not a zero) to save the file, then press Enter to confirm the filename. Press CTRL + X to exit nano.
You will also have to set the SESSION_DOMAIN variable within your .env file to what you choose for your development domain. ex: SESSION_DOMAIN=laravel.dev.test
Windows
To configure your hosts file on Windows, you'll need to edit the C:\Windows\System32\drivers\etc\hosts file. You can do this by editing the file in Notepad. You'll need to run Notepad as an administrator to edit the file.
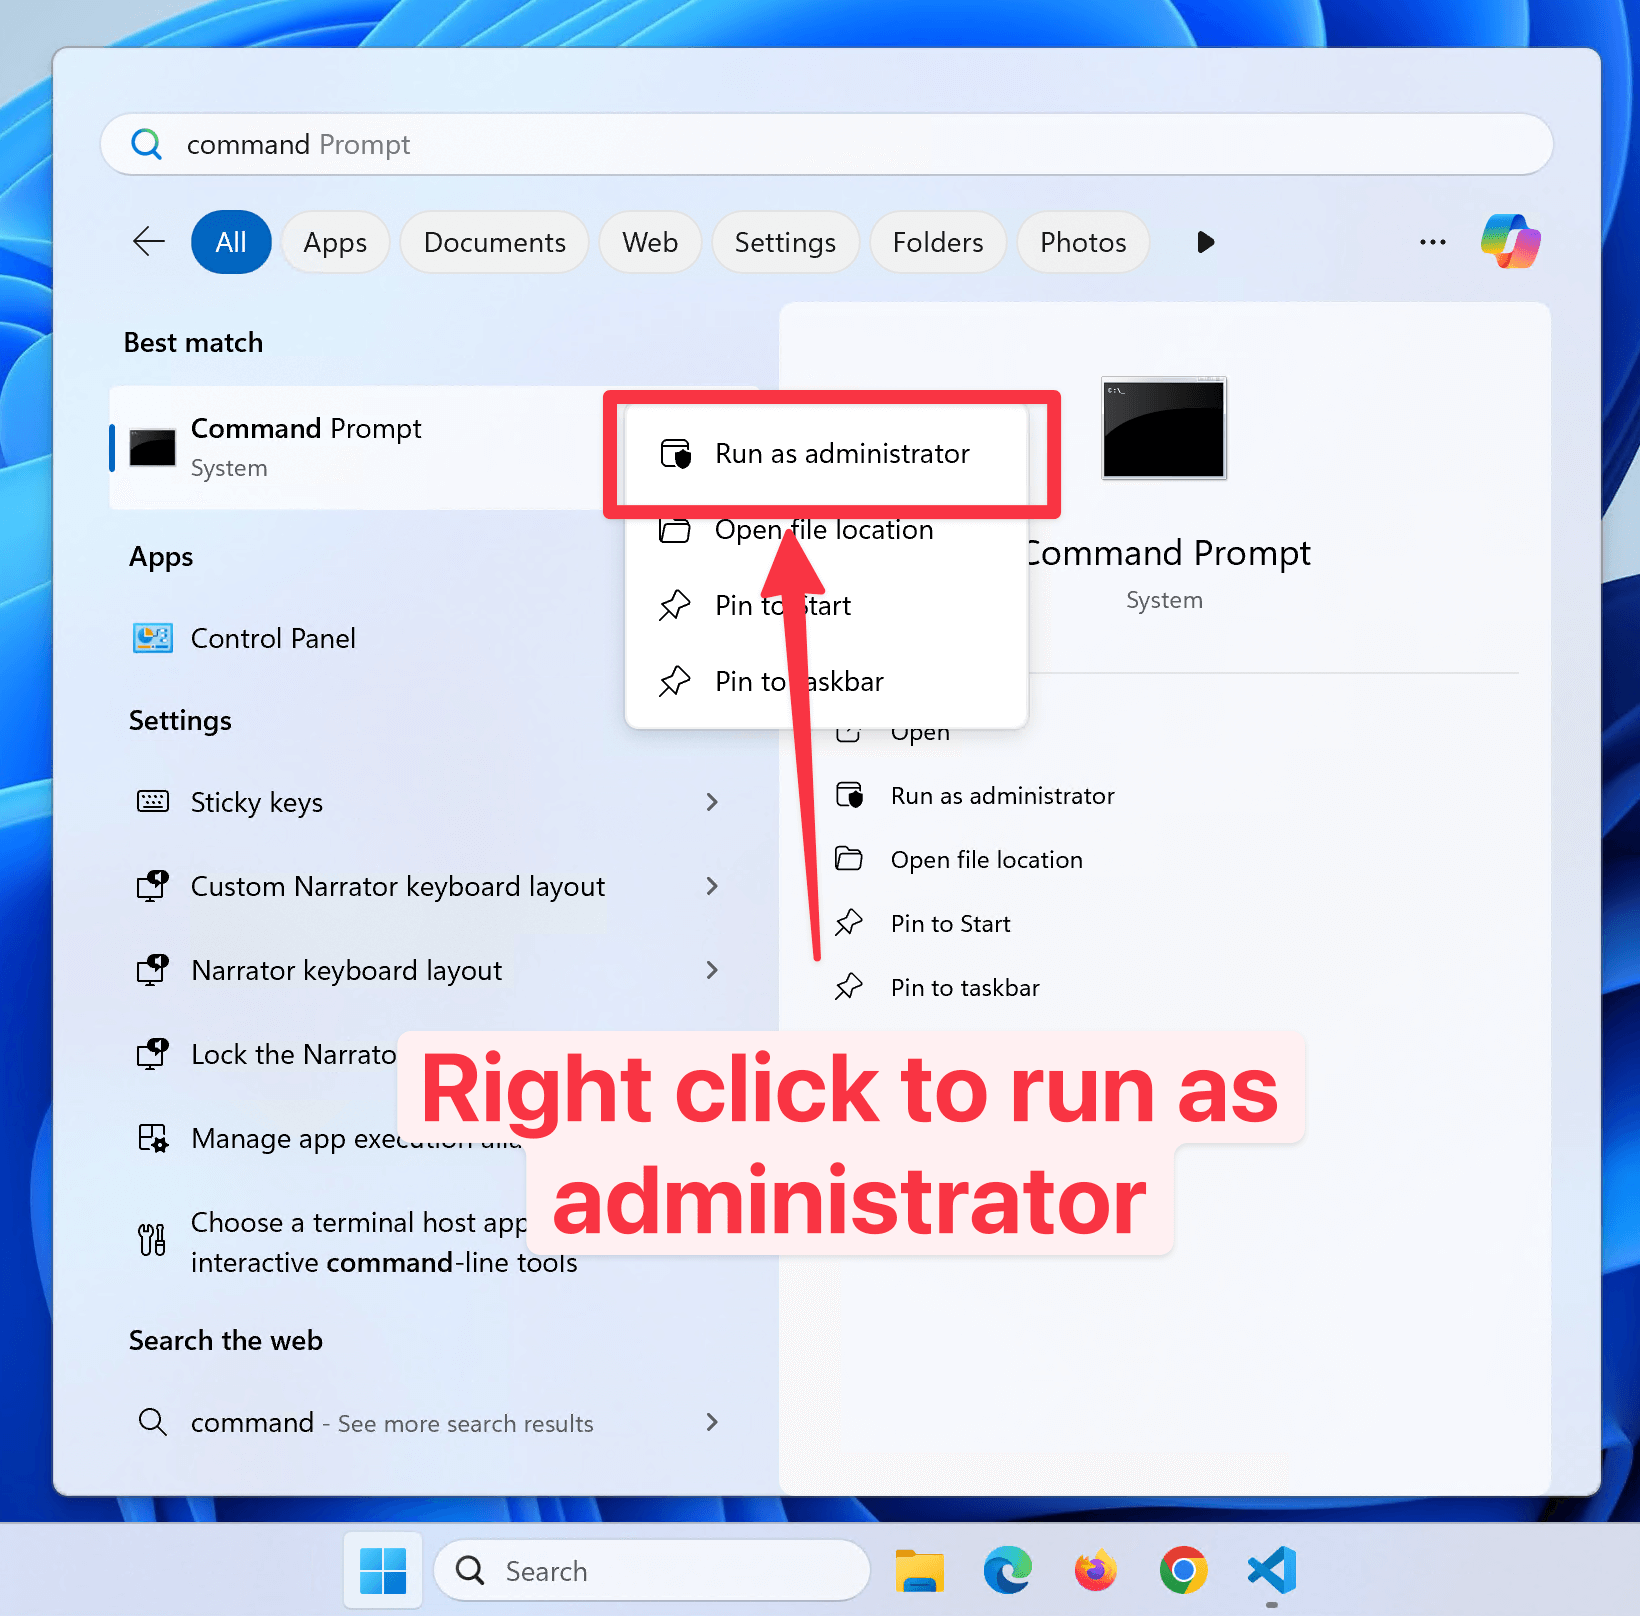
To do this, open up the Start menu and search for Command Prompt. Right-click on Command Prompt and select "Run as administrator".

Once you have a command prompt open, you can run the following command to open the hosts file in Notepad:
Edit the hosts file on Windows
notepad C:\Windows\System32\drivers\etc\hosts
This will open the hosts file in Notepad. You'll see a list of IP addresses and domain names. To add a new entry, simply add a new line at the bottom of the file with the IP address followed by the domain name. For example:
Add a new entry to the hosts file
127.0.0.1 laravel.dev.test
127.0.0.1 mailpit.dev.test
127.0.0.1 vite.dev.test
127.0.0.1 reverb.dev.test
Press CTRL + S to save the file, then close Notepad.
Testing your Configuration
Once you've added the entries to your hosts file, you can test by ping the domain name in your terminal or command prompt. For example:
Ping the domain name
ping laravel.dev.test
You should see the IP address 127.0.0.1 in the output. This means your hosts file is configured correctly.
