Configuring DNS records for your app
Register a domain name
In order for your domain to exist in the Internet, you'll need choose where to register your domain name. The vendor your choose is called a registrar.
Popular registrars
Once you have your domain registered, we can now move forward with configuring our DNS records (think of DNS records as the phone book of the Internet).
Configure DNS records
In this example, we'll be using Cloudflare. Assuming that you've already provisioned a server, we can use the address field in our .spin.yml file to help us configure our DNS records.
servers:
  - server_name: ubuntu-2gb-ash-1
    environment: production
    hardware_profile: hetzner_2c_2gb_ubuntu2404
    address: 1.2.3.4
Whenever you see the address field in the .spin.yml file, we can assume that server is provisioned with that IP address. In this example, we will want to copy 1.2.3.4 and add it to our DNS records.
Add the IP address to your DNS records
To add the IP address to your DNS records, you'll need to login to your Cloudflare account and add the IP address to your DNS records.
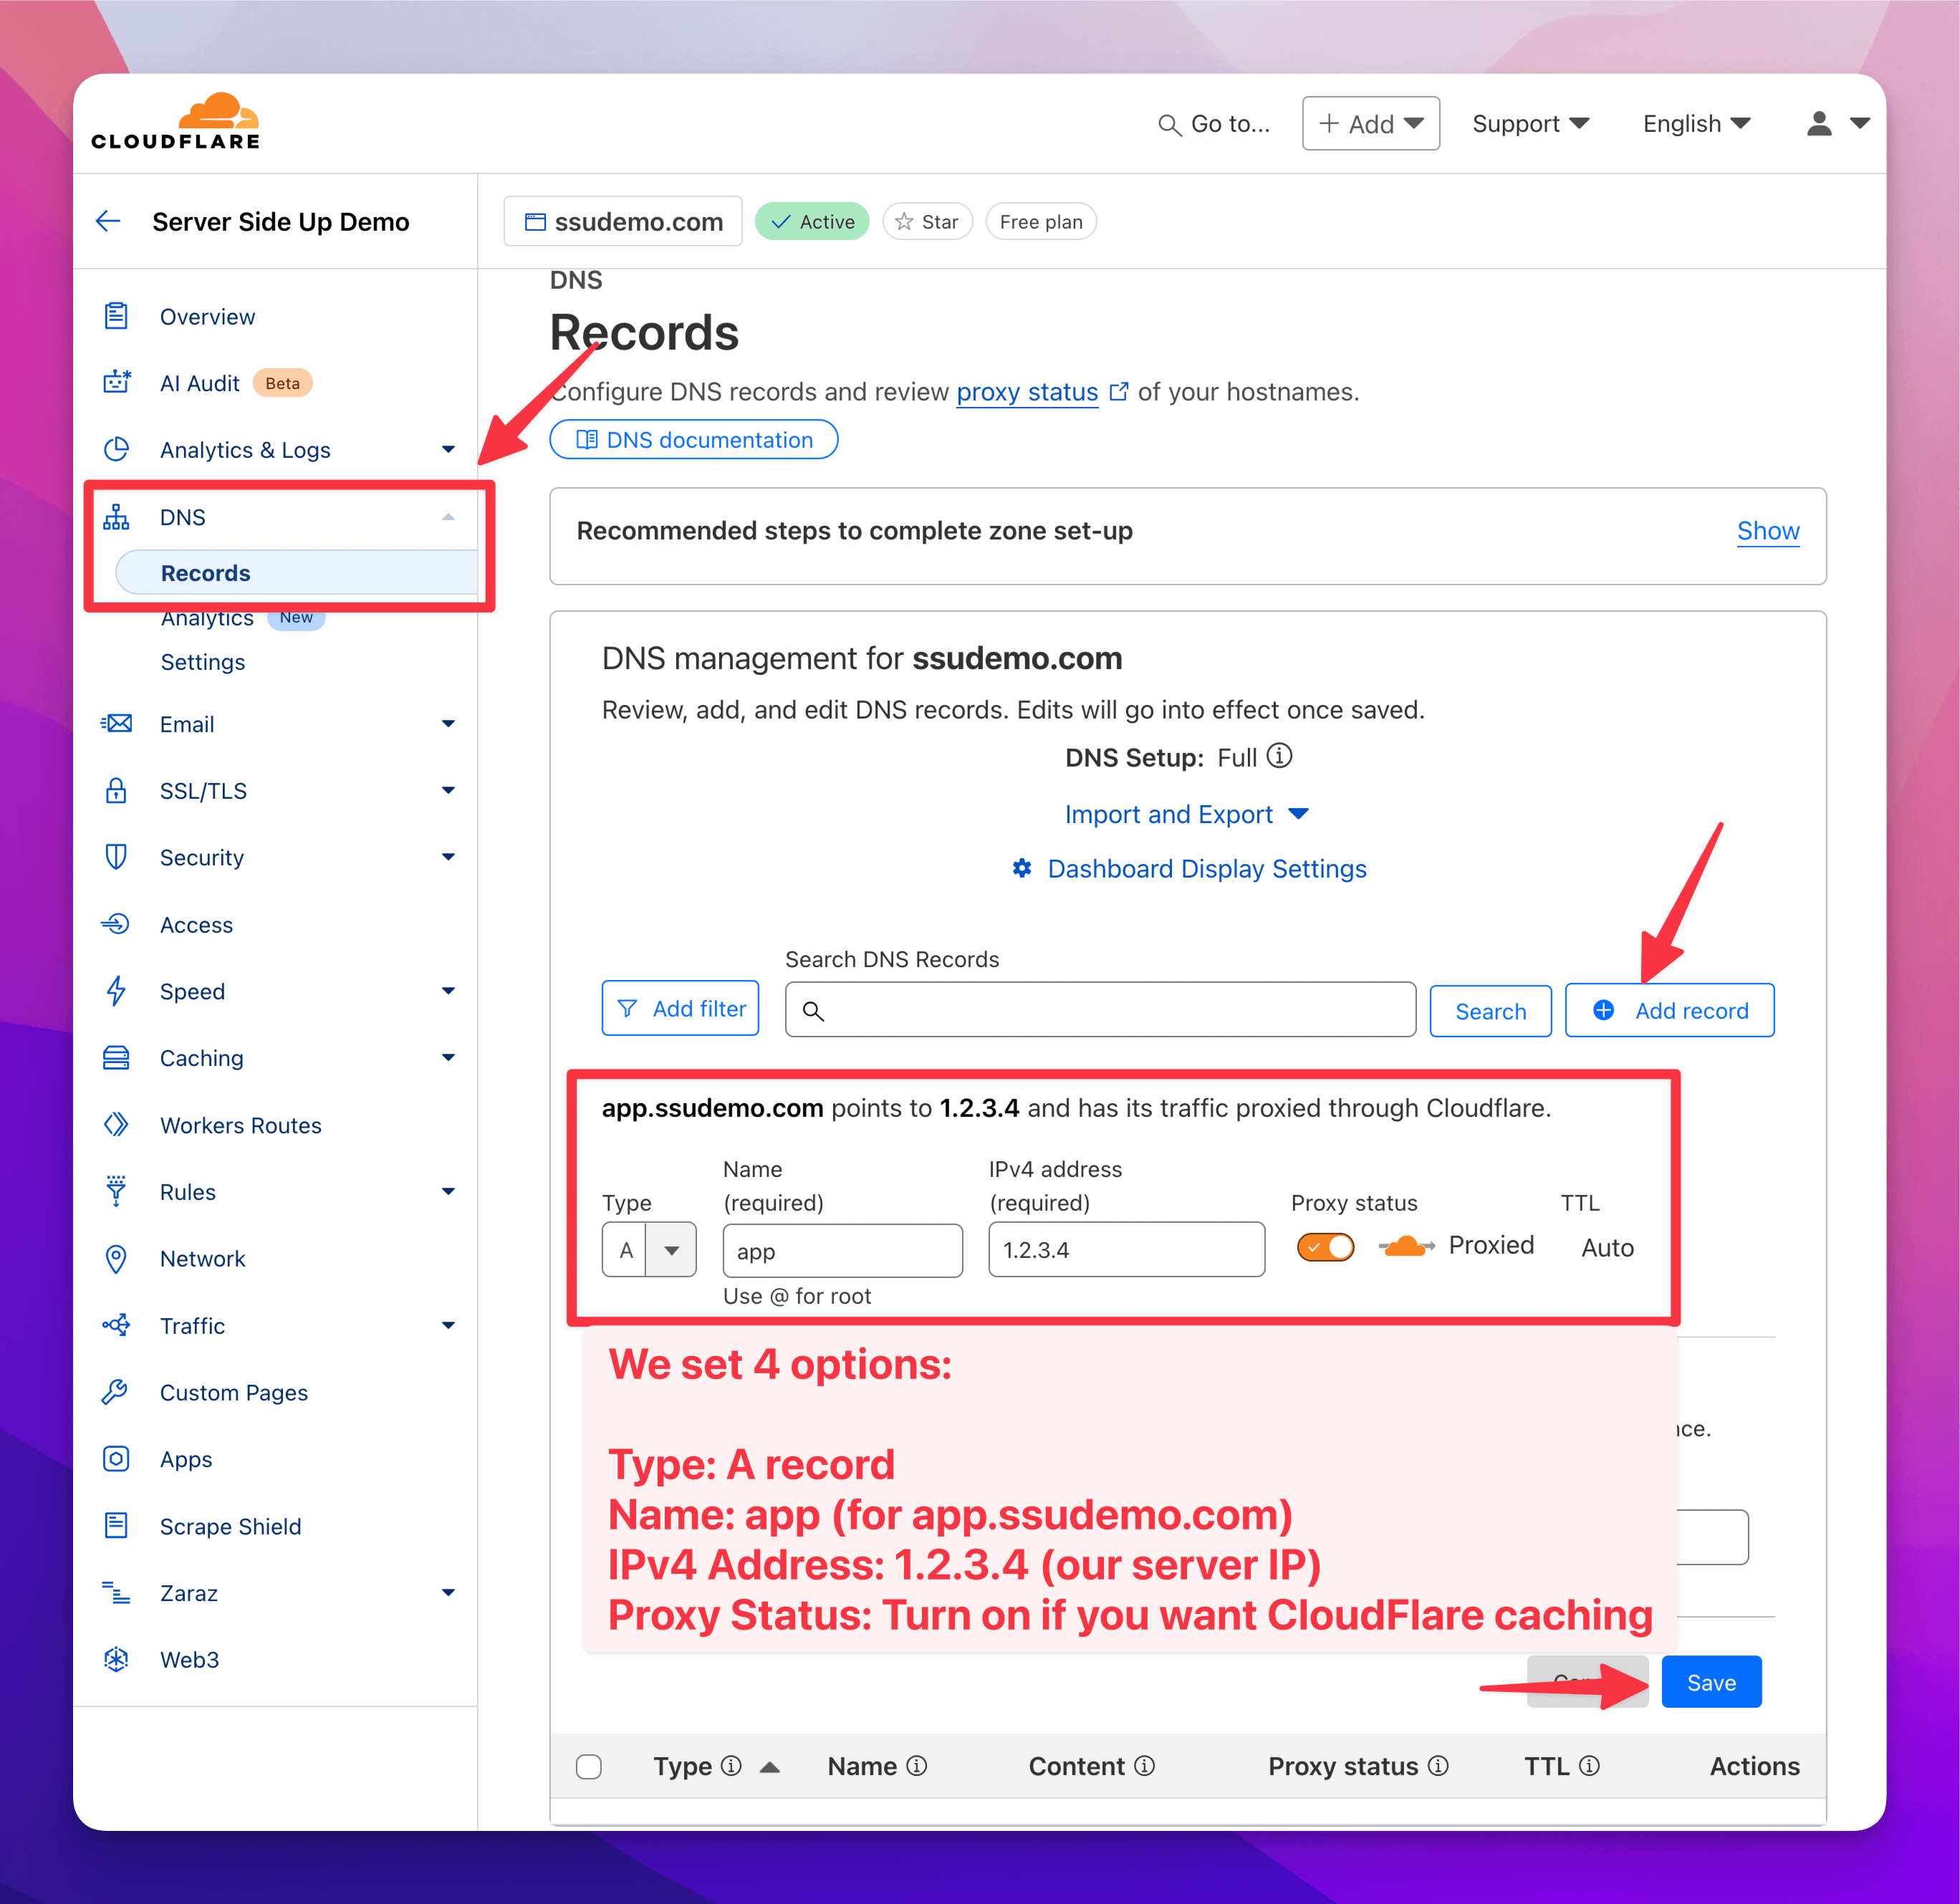
When you're signed in, you'll want to go to the DNS tab and click the Add record button. You'll see there are a few different inputs we need to set:
www.ssudemo.com, ssudemo.com, reverb.ssudemo.com, etc.)| Field | Description |
|---|---|
| Type | The type of record we want to create. In this case, we want to create an A record. |
| Name | The name of the record. If we want app.ssudemo.com, this value will be app. If we want to just use ssudemo.com, this value will be @. |
| Value | The IP address we want to use for our record. In this case, we want to use 1.2.3.4. |
| Proxy Status | It is your choice to have this enabled or disabled. If you choose to have it enabled, Cloudflare will act as a proxy between your domain and the Internet. If you choose to have it disabled, Cloudflare will send traffic directly to the IP address. If you do enable the proxy, just remember you have Cloudflare cache that may need to be flushed on deployments. |
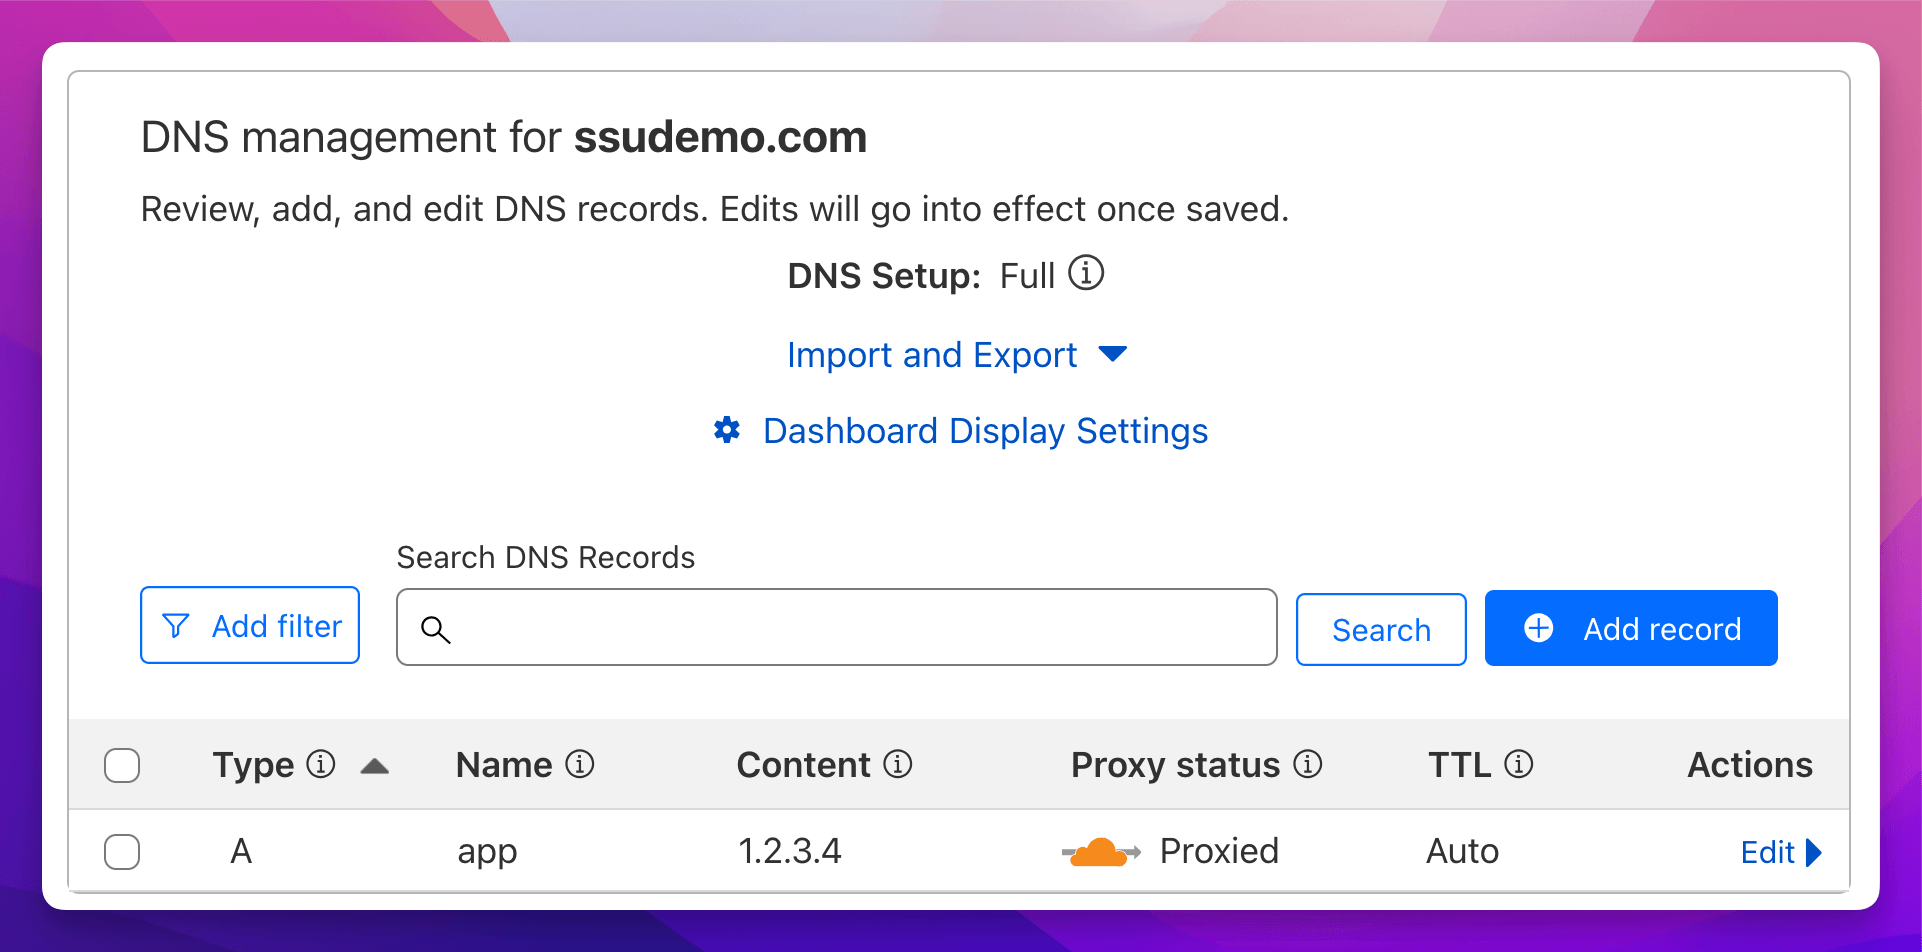
Once you add the record, you should see something like this:
Verify the DNS records
To verify the DNS records, you can use the dig command.
dig +short app.ssudemo.com
1.2.3.4 like in the example above.~> dig +short a app.ssudemo.com
# Output
104.21.82.172
172.67.160.61
CloudFlare Only: Configure SSL Mode
If you decide to use CloudFlare as a proxy (add a record with the orange cloud icon) you may need to configure CloudFlare's SSL mode to work with your app. When CloudFlare makes a request to your app, we want to ensure it's making it over SSL.

To change your SSL mode:
- Login to the CloudFlare Dashboard
- Click on your domain
- Under SSL/TLS encryption, click Configure
- Choose Select under "Custom SSL/TLS"
- Select Full or Full (Strict) for your SSL mode (only select "Full (Strict)" if you have a valid SSL certificate, most of the time your first provision will be "Full")
- Click Save
Generating a Secure SSH Key
Having a secure SSH key is super important. This allows us to authenticate to our servers using keys instead of insecure methods such as passwords.
Configuring your hosts file
In order for your local development environment to work correctly, you'll need to configure your hosts file. This file tells your computer where to look for specific domain names. This is important for local development because you'll be using domain names like `laravel.dev.test` instead of `localhost`.