Automating Deployments with GitHub Actions
Video Overview
We have a video that goes over this process in more detail.
Default Behavior
By default, Spin Pro comes with a GitHub Actions workflow that will deploy your application to your server when you push to your main branch in your repository. This workflow is located in the .github/workflows directory of your repository. You can customize this workflow to fit your needs.
Prepare an .env.<environment> file
Make sure you don't miss the process of preparing your .env.<environment> file. Ensure this is done before moving forward.
Learn how to prepare your .env.<environment> file →
Create a GitHub Repository and prepare for deployment
Once we have an environment variable file created, we can create a GitHub repository for our app right from the CLI using the GitHub CLI with spin gh.
spin gh repo create

# Make sure to push an an EXISTING repository (since we initialize a Git repo for you)
spin gh auth login to login.Configure GitHub Actions Secrets/Environment Variables
In order for deployments to work automatically with our GitHub Actions workflows, we need to configure secrets and environment variables in GitHub Actions. You can do this manually via the UI, but we found it a lot easier to combine this all into an automated process.
spin configure gha <environment>
.env.<environment> file or anything else, just run the spin configure gha <environment> command again. It will automatically update the GitHub Actions secrets and ensure they are up to date.The above command takes out all the heavy lifting for you and will upload your environment variables to GitHub Actions. You can verify their existence by going to the Settings tab in your GitHub repository and then clicking on Secrets and variables then Actions.
Once spin configure gha <environment> completes, you're now ready for deployment! 🚀
Running a deployment
To run a deployment, you simply need to push your changes to your repository. By default, any code pushed to main will trigger a deployment to "production."
git push origin main
Changing the deployment trigger
Some teams may want to change the default deployment trigger. For example, instead of deploying to production when you push to main, you may want to use "release" triggers.
You'll see in the default triggers by looking at the on section of the workflow file. Refer to the GitHub Actions documentation for more information if you'd like to change the trigger.
If you'd like advanced customization, refer to the following GitHub Actions that we've created:
You can also refer to the Workflow syntax for GitHub Actions document if you'd like even more customization options.
Where to watch the status of your deployment
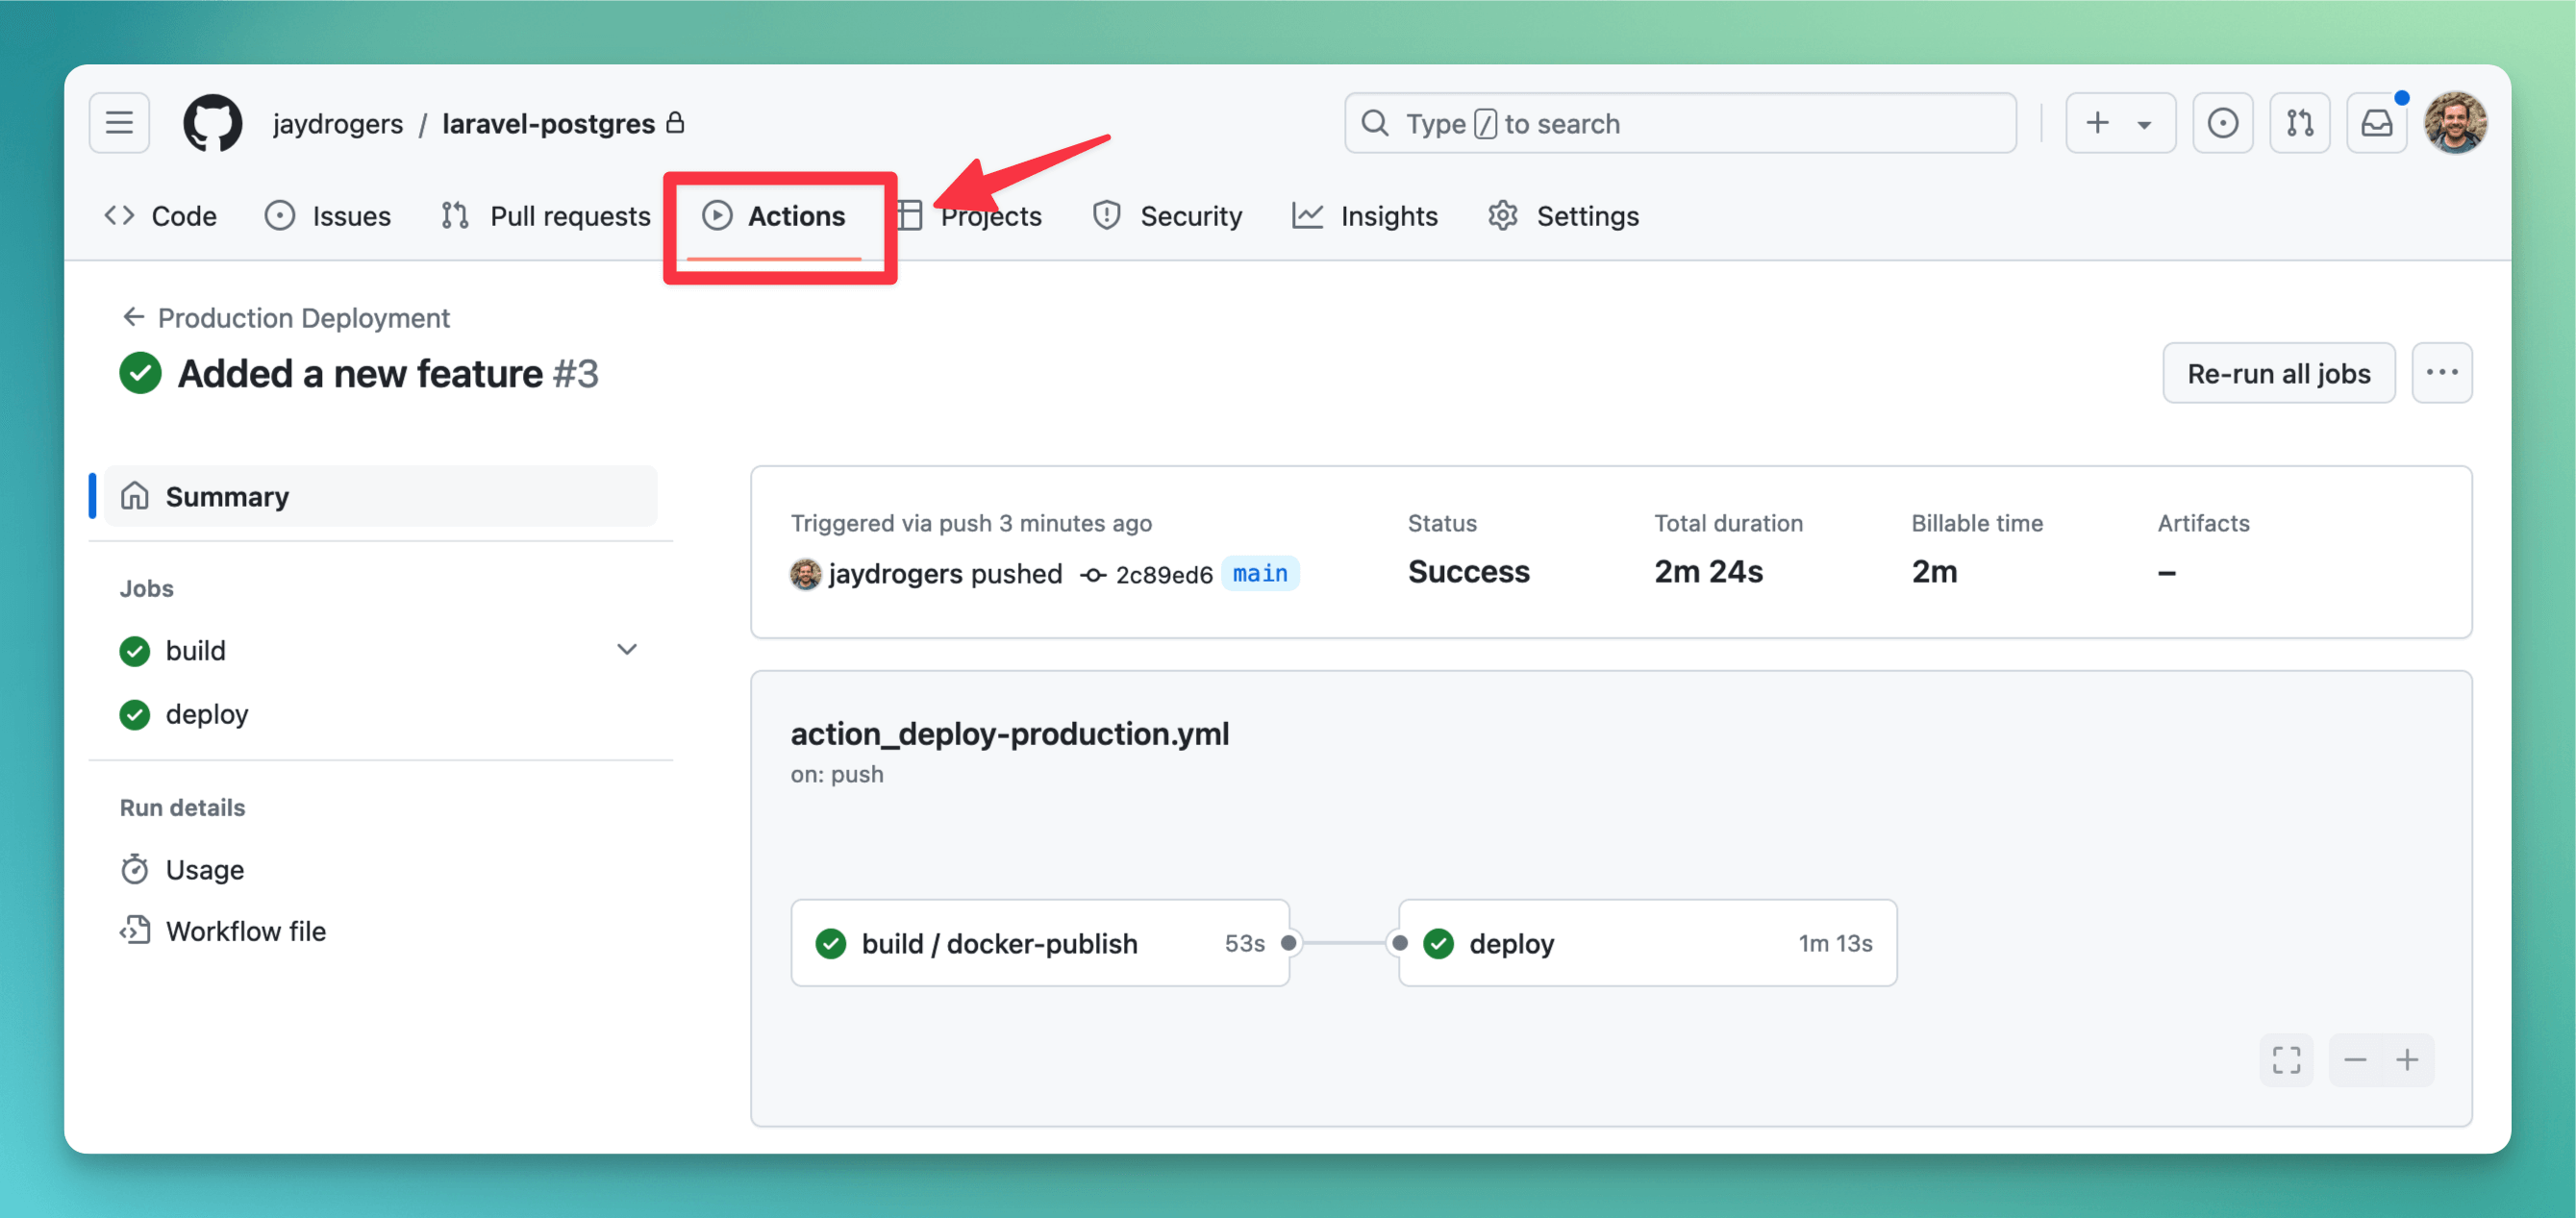
You can watch the status of your deployment by going to the Actions tab in your repository. You can see the status of the deployment and any logs that are generated.
Using self-hosted runners to improve security
If you'd like to improve the security of your deployments, you can use self-hosted runners. This will allow you to run your deployments on your own infrastructure instead of GitHub's infrastructure. You can learn more about self-hosted runners in the GitHub Actions documentation.
Once you have a self-hosted runner set up, you can use a firewall to limit SSH access to your server only from IP addresses that are associated with your self-hosted runner and a dedicated VPN for your team.
Viewing the deployment
Once your deployment is complete, you can visit your application that you set with the APP_URL environment variable in your .env.<environment> file. If everything works, you should see your application! 🥳
Connecting to your server
If you need to connect to your server, you can:
If things didn't work, see our troubleshooting guide.
Preparing an .env.<environment> file
Preparing an `.env.<environment>` file is a crucial step in deploying your application. This file contains environment variables that are used by your application, specific to the environment you are deploying to.
Using "spin deploy"
The `spin deploy` command is the easiest way to deploy your application without downtime while avoiding the complexities of learning CI/CD or GitHub Actions.